 Back
Back Next
Next

| 1.8 Adding Graphics, Audio, and Other Multimedia |
Graphics improve the user experience by providing a visual image that supports the text.
 You can add graphics to a bullet page by clicking the Graphic/Audio button.
Graphics can be in an web readable format (GIF, JPG, PNG, or BMP) or a MS clip art format (WMF, EMF). When you insert an MS clip art graphic, the image is automatically converted to PNG or JPG format.
- You can also add graphics to the Tell Me More, Try This, Step-by-Step, and Sub-page pages.
- Using the Graphic/Audio button you can easily integrate the following into your course: graphics, audio files, simulations, plug-ins, Java applications, or any other web tool.
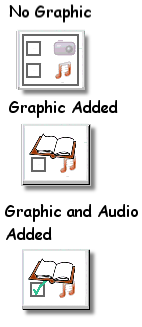
 It's True! When you add a graphic to your page, a thumbnail of that graphic is displayed on the Graphic/Audio button. When you add other types of multimedia such as Flash or PDF, the icon becomes colored orange.
 Tip To have graphics appear inline with the text, you can copy a graphic from another application and paste it directly into any text box. Click the Visual Edit tab, right-click, and choose Paste Special. You are the prompted to specify how you want to convert the pasted graphical content into a web-viewable file.
 Step-by-step
1.8.1 1.8a Need more details? This Step-By-Step page will show you how.
Step-by-step
1.8.1 1.8a Need more details? This Step-By-Step page will show you how.
 About the Graphic Element Type field1.8.2 1.8b Details about the different graphic element types


