 Back
Back| 5.15.1 5.15a Sharing a graphics set with another developer |
| Step | Instruction | What it looks like |
|---|---|---|
| 1 | Choose Appearance > Colors and Graphics from the menu bar. | |
| 2 | Select the graphics set you want to share in the Base Graphics Set field. |
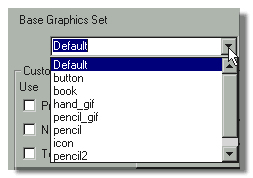 |
| 3 | Click Load. |
 |
| 4 | If you want to further customize the set, select the individual custom graphics that you want to use. | |
| 5 | Click OK to close the Customize colors and graphics dialog box and choose File > Save from the menu bar to save your course. | |
| 6 | Share your course source files (.wct and .wcg) with the other course developer. | |
| 7 | The recipient of your course opens the course.
All the graphics that make up the graphics set
are loaded into this course.
They can generate the course, and it will use t
he loaded graphics.
If the recipient wants to create a graphics set on their computer based on these graphics, they can click Create in the Customize Colors and Graphics dialog box. |
 |
| 8 | After you share the graphics set with another course developer, you can click Unload to remove these graphics from your source files. You already have the graphics set on your computer. |
 |
| 1 | Building a Course |
| 2 | Adding Page Elements |
| 3 | Adding Tests and Surveys |
| 4 | Changing the Appearance |
| 5 | Managing a Course |
| 6 | Using Service Bar Features |
| 7 | Tracking Test Results |


