| Step
|
Instruction
|
What it looks like
|
| 1 |

Choose Testing & Tracking > Certificate Generation from the menu bar.
|
 |
| 2 |
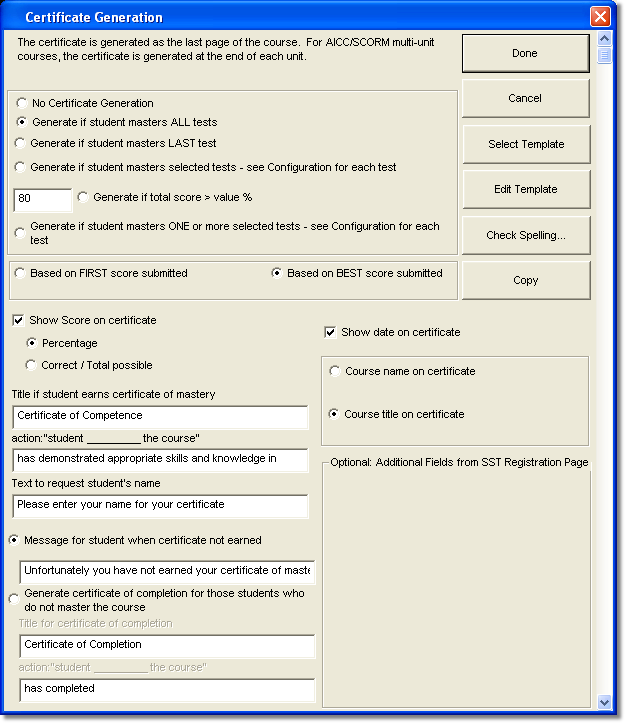
Select whether to generate the certificate if the student masters all tests, if the student masters just the last test, if the student masters all selected tests, if the student masters one or more selected tests, or based on the total score of all tests.
To select tests to be included in the certificate generation, select the option in the Test Configuration for the test.
|
 |
| 3 |
Select whether to generate the certificate Based on the First Score Submitted for the test(s) or the Last Score Submitted.
|
 |
| 4 |
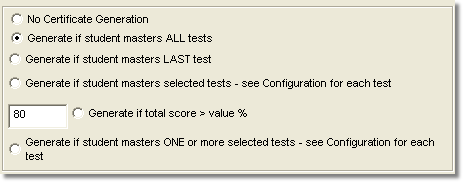
Specify the information to display on the certificate.
Edit the title for a certificate of mastery and the action the student completed (has mastered) if needed.
If needed, edit the message for requesting the student's name. This prompt for the student's name appears at the beginning of the course.
If a student does not earn a certificate, you can either: inform the student with a message or generate a certificate of completion.
If needed, edit the title and the action the student completed.
|
 |
| 5 |
For SST configured courses, if you created additional registration fields, you can select which ones you want to be included on the certificate.
|
 |
| 6 |
To edit the certificate template in an HTML editor or a text editor, click Edit Template.
|
 |
| 7 |
To select a different certificate template to use for your course, select Select Template and find the template on your computer.
|
|
 Back
Back


