 Back
Back| 2.7.1 2.7a Creating a sub-page |
| Step | Instruction | What it looks like |
|---|---|---|
| 1 | Click the Sub-page button in a bullet page dialog box. |
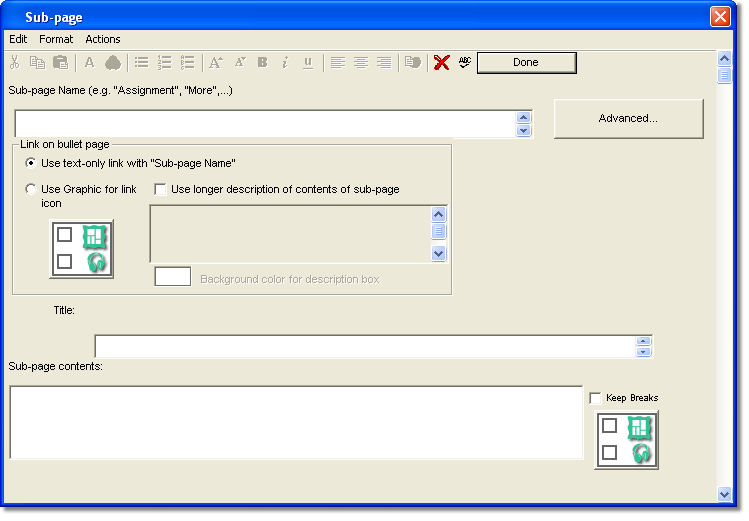 |
| 2 | In the Sub-page Name field, enter a descriptive name for the sub-page. |
 |
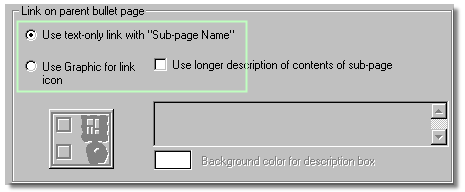
| 3 | Specify how you want the sub-page to be displayed on the bullet page.
To use the sub-page name as the text link, select Use text-only link. To use a graphic for the link, select Use Graphic for link and click the Graphic/Audio button to add the graphic. |
 |
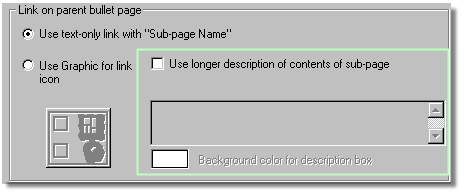
| 4 | To add more descriptive text for the link to the sub-page, select Use longer description of contents and enter your text.
To change the color of the box containing the descriptive text, click Background color and choose a color. |
 |
| 5 | In the Title field, enter a title for your sub-page. |
 |
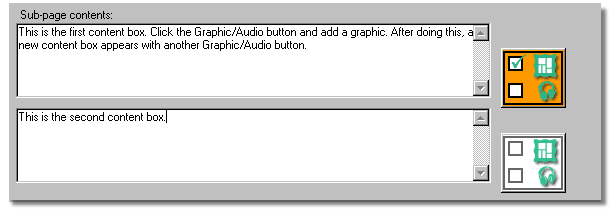
| 6 | Enter the content in the Sub-page contents field. To separate paragraphs with a blank line, type two carriage returns. |
 |
| 7 | You can have up to 10 graphics on a sub-page. Click the Graphic/Audio button to add your graphic. A new Contents field and Graphic/Audio button is created for you. |
 |
| 8 | Click Done to save the sub-page. | |
| 1 | Building a Course |
| 2 | Adding Page Elements |
| 3 | Adding Tests and Surveys |
| 4 | Changing the Appearance |
| 5 | Managing a Course |
| 6 | Using Service Bar Features |
| 7 | Tracking Test Results |


